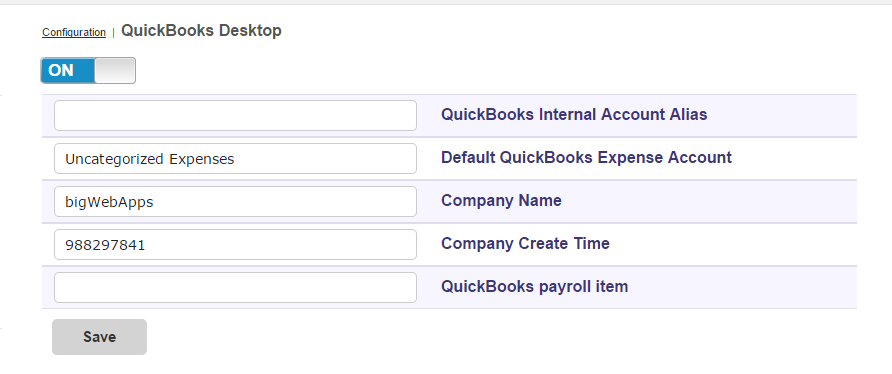
When integrating to QuickBooks Desktop you will need to go to Configuration > QuickBooks Desktop to turn on the integration feature.
You will then need to set up a few fields
QuickBooks Internal Account Alias - (Optional) This field allows you to name your internal account so it matches the name used in QuickBooks
Default QuickBooks Expense Account - The chart of account where you want to place all expense items of an invoice
Company Name - The name of your QuickBooks company. Enter the name as it appears in the company information window of QuickBooks.
Company Create Time - A unique number that comes from QuickBooks company file when you export lists to the Timer. The number identifies which company file the lists came from. You can see an example of this number by exporting your lists to the Timer and opening the .IIF file that QuickBooks creates.
QuickBooks Payroll Item- (Optional) QuickBooks payroll item
You are now ready to create a QuickBooks import file (.IIF)
You can go to the Invoice tab and select which invoices you are ready to export to QuickBooks. When you select 'Export to QuickBooks Desktop' the browser will down the .IIF for you to import into QuickBooks.
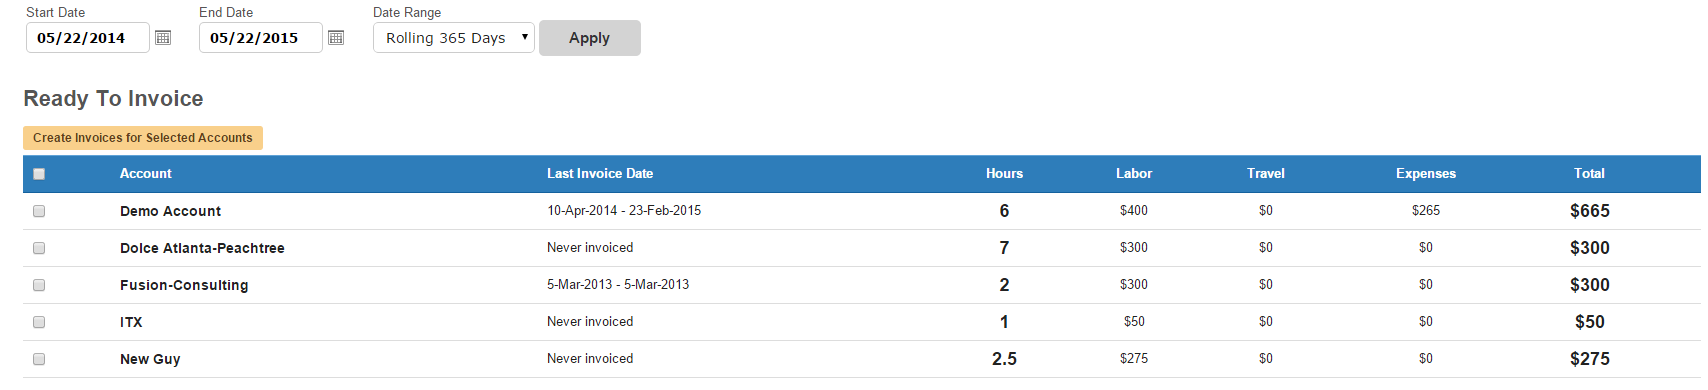
Then select the ones you need to create an export file. This will download an .IIF file in your browser.

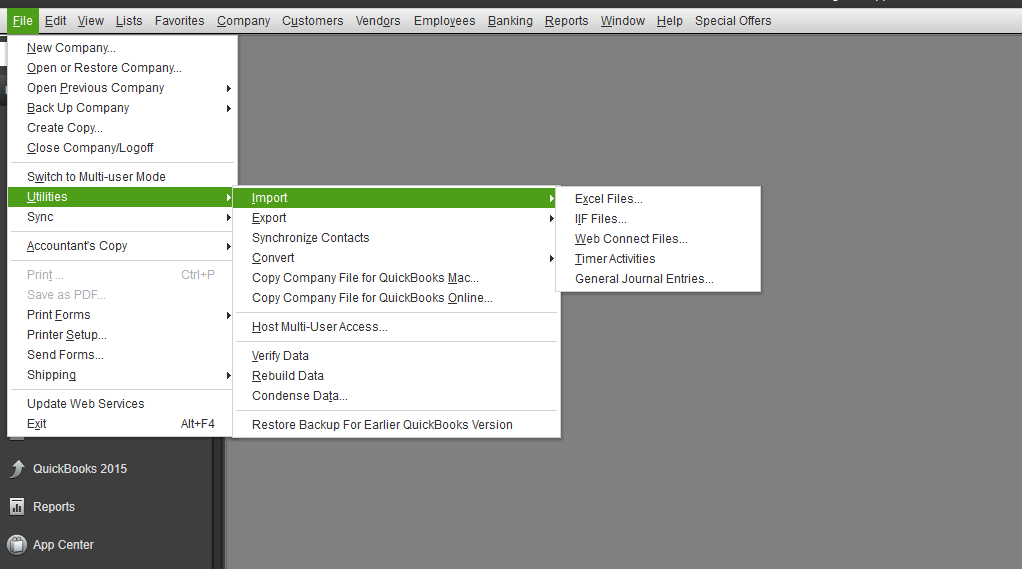
Now you are ready to import your invoices to QuickBooks.
Open QuickBooks and go to File > Utilities > Import > IIF Files. Select the file you downloaded from SherpaDesk.
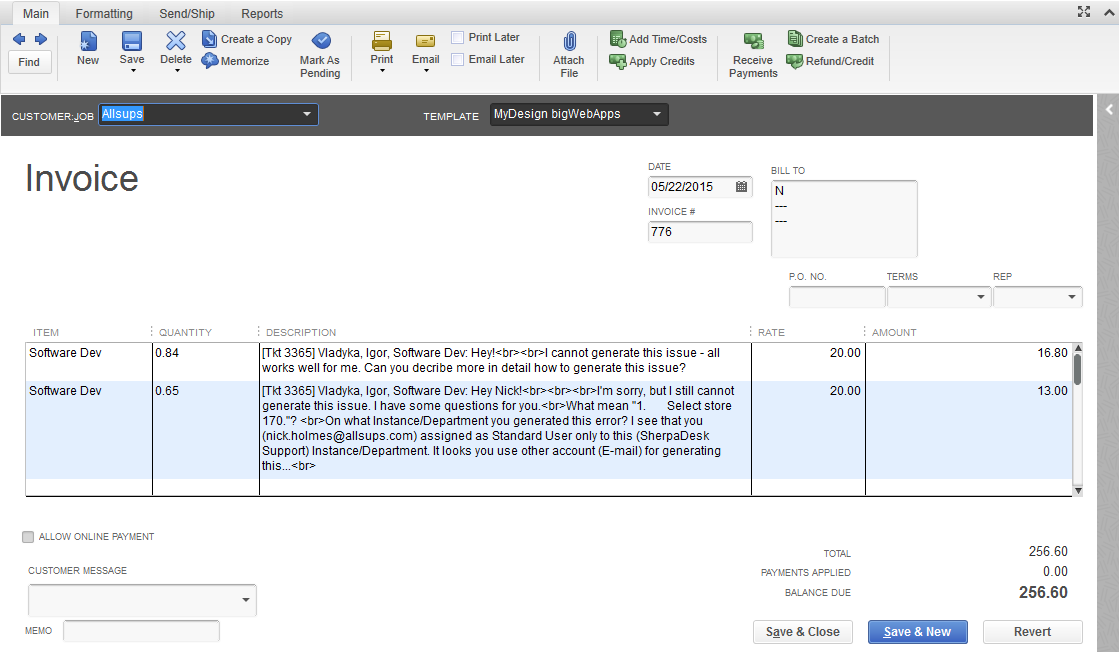
This will import your customer's invoice with the time and rate plans already calculated